We’re excited to share Stage 2 of the extension with you in Clematis, Victoria. Stage 1 of the renovation can be seen in our earlier blog post.
Stage 2: Extension Framework
The extension comes to life during the framework stage! The framework provides you with a visual of the space being built allowing you to see walls, door ways and window openings.
Details of the framework are found on the building plan. The building plan is like an map we use when building. A building plan details:
- the size & types of timbers required to be used in the build;
- provides you with the layout of the build including a floor plan, elevation plans and electrical plan;
- general notations regarding regulations and standards the build must abide by.
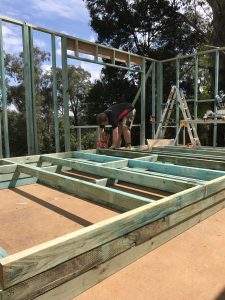
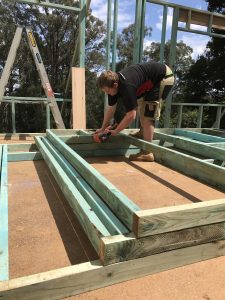
Walls for the extension were individually built. To allow for ease of building and to ensure the walls are built square and straight, they were built lying on the ground.
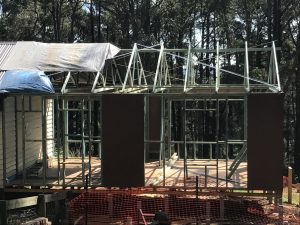
The walls were then stood up and positioned on the floor markings. They are then straightened and braced, ready for trusses to be installed. Trusses are used to support the roofing structure. You can see them in the below photos once they were installed on the wall framework.
The framework stage really does allow you to see the new space taking shape.

Look at all that extra space the extension is going to provide to this gorgeous home! Contact Top Shelf Building & Carpentry today if you want this at your home!
Our next blog post in the extension series focuses on external cladding. Here we start to cover up the framework to provide it with an outside layer (or skin!).